
This week I bought into University the work which I had made at my home Studio; 8 mugs which reflect my core characteristic, so that I made further define my understanding of my creative inspirations and motivations by glazing them as tests for three glazes that I am investigating.
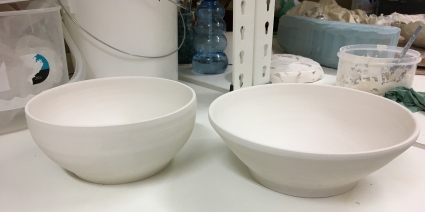
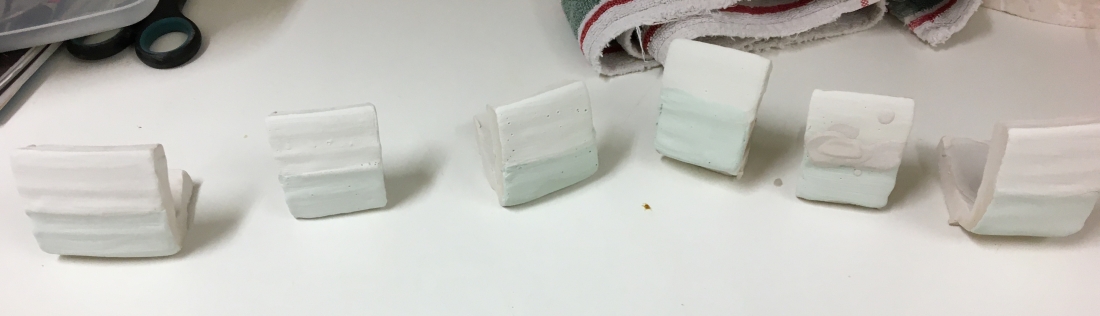
I bought in two bowls which I threw and fired at my home studio, they were made as formers and progression forms for the Gesamtkunstwerk bowl project. I also had made test tiles in Ash White clay body to test various glazes and combinations for my bowl research and development.
The communal bisque firing was started on Monday; I was concerned with the bowls which I had made; the central core of the bowls were cracking, this was potentially due to the tension in the form on relatively thin bowl segments, I tried to alleviate this by applying slurry of Ash White clay mixed with the flocculent properties of vinegar.
 Having evaluated my constructions in Ash White I reconsidered my techniques and material choices. I decided to change the clay body of the form from Ash White to the firmer body of White St. Thomas; this still met with the white aesthetic which I am looking for as a bright canvass for my glazes, but also has the benefit of containing refractory grog to give strength and stability to my intended forms.
I constructed the segmented bowls in the formers that I had thrown and bisque fired, this time I developed my technique from the researched previous bowls and the cracking issues which I had noted.


I applied a lot more compression to the slabs with which I was making to construct the bowls. The bisque fired bowl formers were sprayed with water to prevent the clay body from drying too quickly and so cause cracking. After the segments had been positioned and luted in the formers, further compression was applied with a rib the hone the shape and homogenise the clay body.

 The changes in material and techniques have yet to be bisque fired, however the forms were easier to make in this new clay body and there is no cracking in the form after air drying.
 I reserved a test kiln for Wednesday to fire my test tiles to 1280°C and applied glazes on the tiles with varying applications and combinations of glazes, I then applied the glazes as recorded in the table below.
Test Tile Allocation
| Ash White Clay
Test Tile Number |
Number of coats Applied | Glaze Applied to Bottom half of tile | Glaze Applied to top half of tile |
| 1 | 2 coats | Barium Carbonate with 1 part Copper Carbonate | Barium Carbonate with 5 parts Copper Carbonate |
| 2 | 3 coats | Barium Carbonate with 1 part Copper Carbonate | Barium Carbonate with 5 parts Copper Carbonate |
| 3 | 6 coats | Barium Carbonate with 1 part Copper Carbonate | Barium Carbonate with 5 parts Copper Carbonate |
| 4 | 8 coats | Barium Carbonate with 1 part Copper Carbonate | Barium Carbonate with 5 parts Copper Carbonate |
| 5 | 6 coats | Barium Carbonate with 1 part Copper Carbonate | Barium Carbonate with 5 parts Copper Carbonate |
| 7 | 6 coats | Barium Carbonate with 1 part Copper Carbonate | Barium Carbonate with 5 parts Copper Carbonate |
| 5 | 2 coats | Applied on centre of tile over Barium Glazes | 1.Silicon Carbide Glaze
2. Silicon Carbide Glaze with Orange Stain 3. White Slip |
| 7 | 2 coats | Applied on centre of tile over Barium Glazes | 1.Silicon Carbide Glaze
2. Silicon Carbide Glaze with Orange Stain 3. White Slip |
I considered the contents and application of my glazes; I thought that due to the application and oxide flux constituents that the glazes could have the potential to run  off the tiles , to prevent the glaze damaging the kiln or bats I fire the tiles on silica sand on a crank bodied kiln tray.

I retrieved the test tiles from the kiln; the results gave me the information that I needed, and I could make informed decisions about the number of glaze applications.

I had applied some white slip on top of the silicon carbide glaze to refer to sea foam and Mytilus sea worm growth on rocks and marine objects such as buoys; this however was not successful and I will consider using the feldspar Nepheline syenite to illustrate this sea biology.

I had discovered that where the barium carbonate and copper carbonate had been applied more thickly, this had caused the silicon carbide glaze to run off the tile possible due to the abundance of flux in the thick layer of barium base glaze underneath it.

I had applied to the back of one test tile some of the silicon carbide glaze on its own; this part of the tile is horizontal and flat, the glaze behaved in a rewarding way and informs we about the glaze reacting with barium carbonate glaze and vertical surfaces.

Tile one with the least applications of the barium based copper carbonate glazes gave great results and speaks of deepening sea water and calm surface waves; I am considering this application as there is less barium glaze to affect the silicon carbide and the aesthetic meets my intentions.
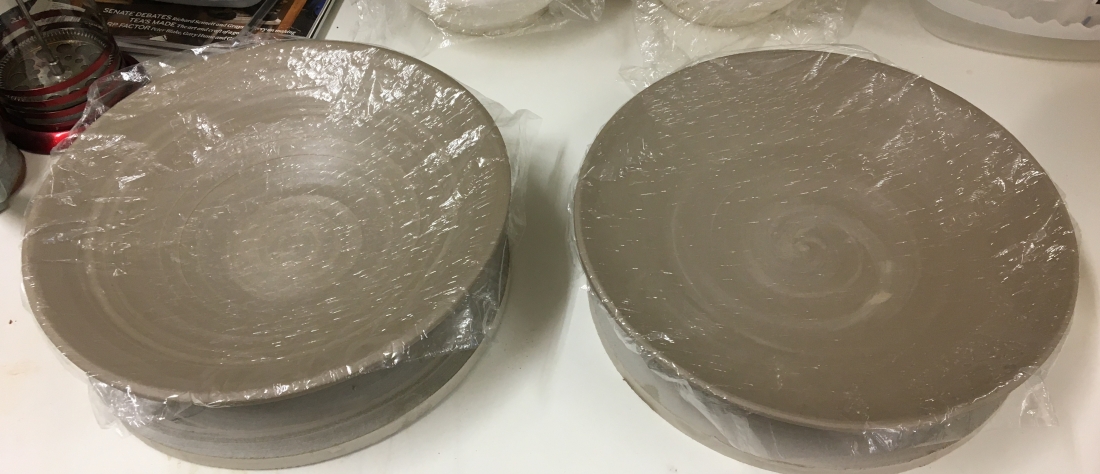
I retrieved my first Ash White body, segmented bowls from the communal  bisque – I had feared that they would not survive due to the tension cracks which I had noticed after air drying, however they were intact and met with my intentions.

Having evaluated my glaze test tiles I considered how to apply the glazes in terms of physical application techniques and levels of glaze thickness.
I considered that the most efficient and practical way to apply glaze to this challenging form was a combination of spraying and brush application. The two coats that were  brush applied to tile one rendered the aesthetic that I am intending to achieve, I considered that this will equate to four sprayed coats, I measured the thickness as I sprayed with a potters pin on a stick to achieve the correct thickness. The segmented bowl was placed on a chuck to facilitate easier application with the spray gun.

The silicon carbide glaze and Nepheline Syenite was applied using a hog hair brush after spraying.

The Segmented bowl will be fired to 1280°C on Monday 21st October.
Considering the progression of my Gesamtkunstwerk bowl designs I have made  some sketches and investigations; I had a wheel throwing tutorial with Duncan- this tutorial was very good and I enjoyed developing my technical skill so rapidly, by the end of our tutorial I was throwing large articulate and wide shallow bowls which I had been trying to master for progression of my initial Gesamtkunstwerk bowl intentions. This session really informed my practice and buoyed my confidence.

Evaluation
This has been a very busy and productive week; consulting my project brief and plan I have appraised and developed my work and think towards my professional ambitions within this project and future development of my core characteristics.
I have addressed areas where my intentions and techniques need addressing and have continued making iterations to correct issues and work towards achieving my creative and professional intentions.
I have documented my work at every stage of its development; I have also recently sourced the facilities to start recording my work and practices in a video format.
This project is busy but informative and encouraging, giving me the skills development to research and develop my own character of work to lead to future professional development.
 throwing and glazing skills, and made further iterations of my bowl shapes and formers. I made the decision to throw these formers in White St. Thomas clay body as this clay body may shrink less than the Ash White sections that I am going to form in the bowls; this may help maintain the integrity of the bowl segments in the kiln due to the higher percentage of grog in White St. Thomas clay body.
 The bowls which I had thrown in my home studio were turned ready for bisque firing on the weekend.

 my fingers had dried over the weekend in the plaster drying cupboard. The test results were promising, so I decided to source more “Alginate and suitable containers to take castings of both of my hands.


 dimensions and the forms sit well placed on top of each other and give hope that the resultant formed segments will meet my creative intentions.


 integrity of the segmented form may be compromised. The aesthetic achieves was very rewarding and fully met my present creative intentions, however I was aware that cracking in the segments may occur due to the dryness of the bisque fired formers.

 research for my dissertation concerning glazes. On the weekend I packed the kiln and set the bisque firing.
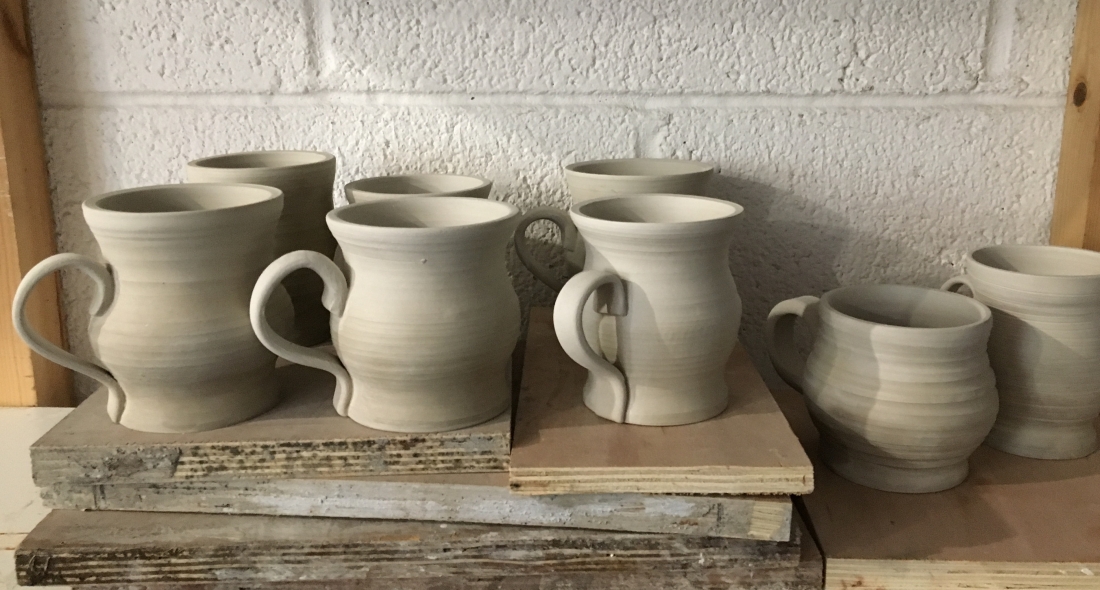
 had given to me; I programmed 50°C per hour up to 600°C, then 100°C per hour up to 1020°C- taking note of the Orton 06 pyrometric cone at around 950°C to observe if a working temperature had been achieved.


 science of glaze and glaze development. I looked at artisan produced items and questioned how they were made and what the glaze recipe could be. I decided to use a mug which I bought in the summer as a basis for this investigation and used its form as a guide to create a series of my own closely resembled design. I research the possible glaze recipe through text books
 Cooper, which also included Dolomite. I decided to examine three dolomite recipes by Frank Hamer, Geoff Swindell and Emmanuel Cooper to evaluate how these glaze recipes behaved differently.
 I had thrown the mugs at my home studio inspired by a favourite which I purchased during the summer. Throwing to a pattern and attaining repetition is a good discipline that I considered would develop my skills process in readiness for the forthcoming bowl project.
 demanding collared form which further developed my throwing skills.
 researched for their aesthetic and manner in which they may behave on the surface of a stoneware form I made the test tile rings in order to test the glazes. The surfaces of the mugs and jug that I am investigating have intentional scribed throwing rings on the surfaces, I wish to see how my researched glazes behave therefore I have scribed throwing rings into the test tiles.
 further research into the material of Dolomite I made several glaze recipes.
 techniques which I investigated last year; an exploration with Barium based copper carbonate glazes combined with silicon carbide glaze did not give me the creative results that I was trying to achieve, however, the resultant marine- like barnacle encrusted themes that the investigation yielded was very pleasing and one which I learned from. I intend to explore this for my bowl project by further investigating the recipes and applications, and possible combining another glaze to impart coastal flora- perhaps Lichens. I have made these glazes to test combinations in the coming weeks.
 I am considering my segmented bowl design based on the parabolic cross sections that define the bowl’s shape. If the bowl is constructed using a finite number of cross sections, I consider that this form exposes the bowl in component parts illustrating the symmetry of the form ; in doing this the form still maintains integrity, but takes on a different existence and imparts other references. I feel that this design imparts marine life, possibly sea anemones, urchins or even man made nautical tools such as gaffs and anchors. The “arms” of the upper bowl reach out in hope and searching.
 interpreting the mathematics, as well as practical slab building; it is my intention to use a malleable clay body with a white aesthetic. The slabbed cross sections of the form will be bisque fired in a bowl that I will throw to achieve the desired shape, this bowl will act as a former to maintain the segments’ shape whilst firing. This process will demand two different former bowls to be throw on the wheel, I am hoping to construct the segmented bowls in the dried thrown bowls and then bisque firing the bowls together.
 from glaze testing and exploration; I intend to join one bowl on top of the other and to adhere them together using the applied glaze to fuse the forms together.
 with. I Commenced with Ash White due to its malleable qualities and bright white aesthetic. I threw several bowls to attain the correct form and size to act as formers for the segmented bowl; these bowls are also the correct dimensions for my intended technical development of the bowl and may be also used in this augmentation. I originally threw 3 pound balls of clay but increased the volume to 4 pounds to achieve the correct form.
 At my home studio I threw the two bowls using ash white clay body to act as formers form the segmented bowl slabs, these will be turned because they may also be used for glaze testing or future technical development of the Gesamtkunstwerk bowl.


 object hood and psychoanalysis and have reflected on where I was bought up on the rural coast of Devon and my youth during the time of great social economic and technical change of the 1950’s 60’s and 70’s.


 extols nature, its mathematical symmetry and exuberance of petals that endorse and follow the form of the wide bowl form.
 Sharon Bladhol. At Rest. 2000. The sculptural figure that has the movement of falling and splashing into this mineral like bowl is inspirational to my own thought in developing my techniques and design for the Gesamtkunstwerk bowl involving more than one artistic discipline.
 glazing is exuberant; the form is wide generous and inviting like the sea, whilst the colour are rich and jewelled conjuring thought of the sun setting on the sea.
 Ljubov Seidl Sea World II Bowl 1999. This beautiful bowl is reminiscent of the work of 16th Century Ceramicist Bernard Palissy, its sculptural inclusions of marine crustaceans celebrate the sea using disciplines in throwing sculpture and bright coloured glaze techniques.
 with a central disc of blue glass provokes thoughts of coastal rock pools inviting exploration.


 me, it does illustrate the diverse way in which clay can interpret and celebrate nature. The articulate sculptural hand building speaks of flora, sea and weather within a boat like bowl form.


 was saggar fired with seaweed and sawdust; the generous wide bowl dissipates to a fragmenting rim depicting the ebbing sun .
 Arlene Cason. Horsehair Raku Pedestal Bowl 2002.
 Judith Motzkin Cut Edge Bowl 1999. This white earthenware thrown bowl has sea shore cast shell like qualities achieved with terra sigillata and saggar firing.
